HOW TO MAKE RICOTTA CHEESE - Easy Make
 |
| Traditional Ricotta Cheese is made using leftover whey from making other cheeses, that use a coagulant like microbial, vegetable or animal rennet (example: Cottage Cheese, Mozzarella etc). Given that for being a vegetarian, making traditional ricotta is out of bounds since 99% of other traditional cheeses are made with animal rennet, I opt for making Whole Milk Ricotta Cheese; In which case it becomes virtually similar to the Indian Cheese - Paneer. You can make Paneer the same way as this (in which case,the salt is not required, but can be added along with spices for interesting variations). Also note that the leftover whey that you get from making Paneer cannot be used to make Ricotta, since it also uses Vinegar/lime juice. |
{ Preparation & Cooking Time : 2 To 4 Hours }
Difficulty : Easy
Meal Type : Vegetarian
Serves : 2
Cuisines : Indian, World
Ingredients
• 2 quarts (1.89 liters) organic Whole Milk,
• 1 cup organic Heavy Cream,
• 3 tablespoon white Vinegar
• 1/2 teaspoon salt
Preparation Method
1. In a heavy saucepan, combine milk and cream and warm in moderately high heat.

2. 3until the surface becomes foamy and steamy and an instant-read thermometer inserted in the milk registers 185F°. Don't let the milk boil.
Update: I was under the assumption that the specific heat was due to the addition of Heavy cream. But turns out that you don't even need this much temperature (leave alone boiling the milk). Here is a good explanation from Serious Eats about the temperatures.
Most ricotta recipes call for heating the milk to 180°F, the temperature at which it starts to simmer. But is it really necessary to heat it that high? I tried heating pots of milk to various temperatures (every five degrees between 150°F and 190°F) before adding vinegar as a coagulant and observing the results. Guess what? Between 165°F and 185°F or so, there was no real noticeable differences in the amount of curd produced, nor the texture of the curd. So where does this particular piece of culinary you-wishdom come from? My first instinct is that it's a carry-over and misapplication from the days when custards were made with un-pasteurized milk. Back then, milk had to be heated to 180°F in order to deactivate certain enzymes that can prevent a custard from setting. These days, milk is pretty much always pasteurized (heated before packaging) so this step is unnecessary. But wait a minute! Pasteurized milk is only raised to 161°F and works perfectly well in custards. So that whole 180°F for custards rule must also be a myth. My best guess as to why many recipes arbitrarily pick 180°F? It's the point at which milk starts simmering: an easy temperature to gauge even without a thermometer. But seeing as we've all got one (you do all have an instant read thermometer, right?) We'll stick with the 165 to 185°F range, instead of aiming for that perfect 180°F.

4. Remove the pot from the heat. Add the vinegar and stir gently for 30 seconds;

5. The mixture will curdle almost immediately.

6. Add the salt and stir for 30 seconds longer.
.jpg)
7. Cover the pot with a clean towel and let stand at room temperature for 2 hours.

8. Line a large colander with several layers of cheesecloth, allowing several inches of overhang.
and Set the colander in a large bowl.

9. Using a slotted spoon,

10. transfer the curds to the colander.

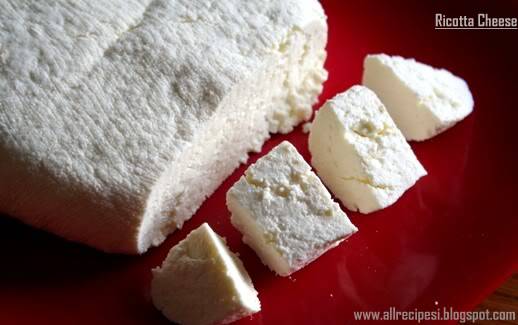
11. I am not sure why the site insisted on transferring using a slotted spoon cos after 5-6 times, I kinda felt stupid doing that and toppled the whole pan on to the cheese cloth. Saved me time and effort! (If there is a specific reason drop me a line.) Will you just look at that glorious cheese (In India, this stage is referred to as "Chenna" and used to make many heavenly sweets)

\
12. After you had a fill of gazing at that beautiful cheese " like a lovelorn lover" (I overheard the father and son snickering after calling me so) gather the corners of the cheesecloth and close with a rubber band. Or force the snickering husband to hold it that way for the next 30 minutes.

13. Let the ricotta stand for 30 minutes, gently pressing

14. and squeezing the cheesecloth occasionally to drain off the whey. That, right there, is what Greeks (or probably someone else!) termed as "Healing Water". PLEASE DO NOT EVEN THINK OF DISCARDING IT! If you so totally must, send it over to me. :-D.

15. Now use this Ricotta for your recipes. The site mentions that the cheese keeps well for 4 days refrigerated.


I usually use the whole thing to make a dish or eat it mixed it with little sweetener and vanilla extract. Or spread it on my toast with honey or ..or..I can go on and on and on. The site suggests that it keeps well for 4 days packed in an airtight container. But another friend told me that hers lasted for 12 days when she made using this recipe. I think simply use your judgement and good sense of smell to decide how long your cheese keeps well for. For something so ridiculously easy to make, this tastes like a million bucks!
ENJOY


Comments
Post a Comment